![Neeve-Logo-Lockup-SM_rectangle_reverse .png]](https://support.neeve.ai/hs-fs/hubfs/Neeve-Logo-Lockup-SM_rectangle_reverse%20.png?height=40&name=Neeve-Logo-Lockup-SM_rectangle_reverse%20.png)
Roles and Responsibilities
- System Administrator: Authorized to access the Users navigation module and create new user profiles.
- IT Helpdesk / Operations Support: Validates user credentials, domain assignment, and scope before profile creation.
1. Step-by-Step Procedure
Step 1.1: Navigate to the User Management Portal
- Log in to the administrative portal using your assigned administrative credentials.
- From the primary left-hand navigation menu bar, locate and click the Users icon (people/group symbol).
- Ensure you are directed to the Users directory page.
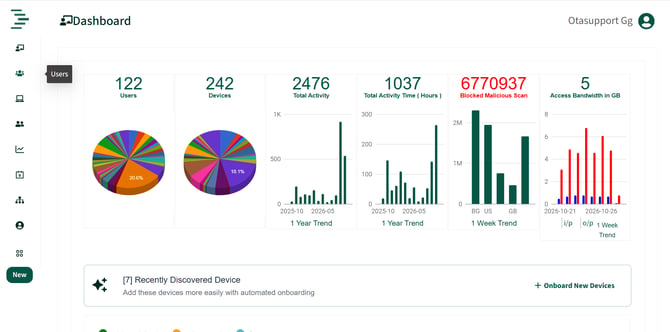
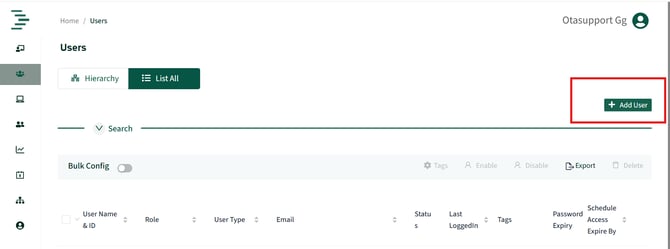
Step 1.2: Initiate User Creation
- On the top right of the Users page header (above the data table and search filters), locate the green + Add User button.
- Click + Add User to launch the user configuration modal window.
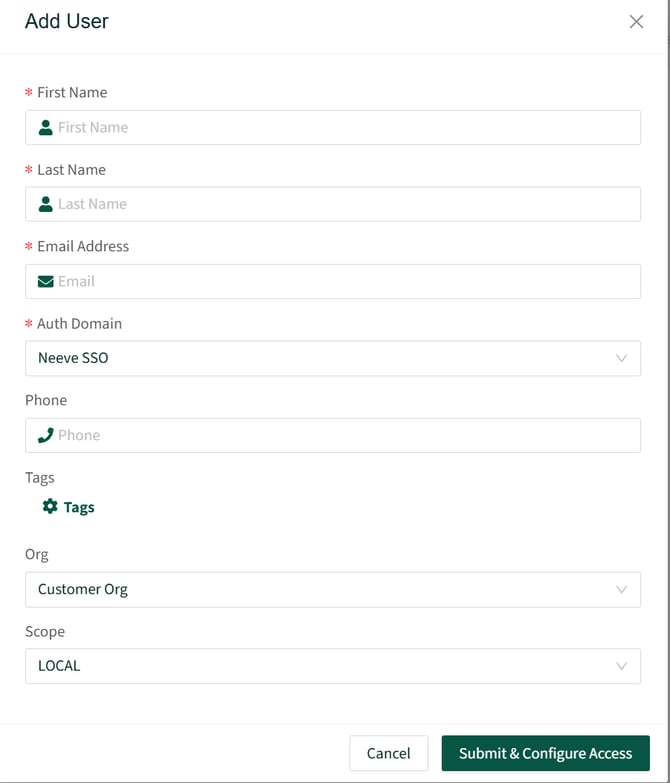
Step 1.3: Complete Mandatory & Optional User Information
Enter the required user parameters accurately into the input fields as outlined below:
|
Field Name |
Requirement Level |
Description & Formatting Rules
|
|---|---|---|
|
First Name |
Mandatory (*) |
Enter the legal or official first name of the user. |
|
Last Name |
Mandatory (*) |
Enter the legal or official last name of the user. |
|
Email Address |
Mandatory (*) |
Provide a valid corporate/organizational email address (used for notifications and login identification). |
|
Auth Domain |
Mandatory (*) |
Select the appropriate Single Sign-On / Authentication service from the dropdown list (e.g., Neeve SSO). |
|
Phone |
Optional |
Enter primary contact phone number including country/area code if applicable. |
|
Tags |
Optional |
Attach relevant metadata tags to streamline search and categorization. |
|
Org |
Optional / Dropdown |
Assign the user to their designated organization entity (e.g., Customer Org). |
|
Scope |
Optional / Dropdown |
Define access boundary level (e.g., LOCAL). |
- Click Submit & Configure Access to proceed to the access setup stage.
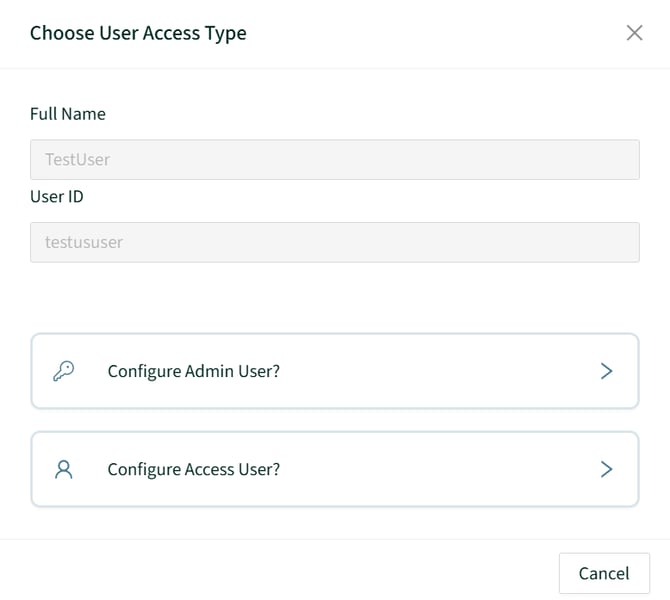
Step 1.4: Select User Access Type
Upon initial submission, the Choose User Access Type screen displays the user's auto-generated Full Name and User ID. Select one of the following configuration paths:
- Configure Admin User: Select this option if the user requires elevated administrative rights across the system.
- Configure Access User: Select this option to configure standard user permissions, group associations, and time-bound access schedules.
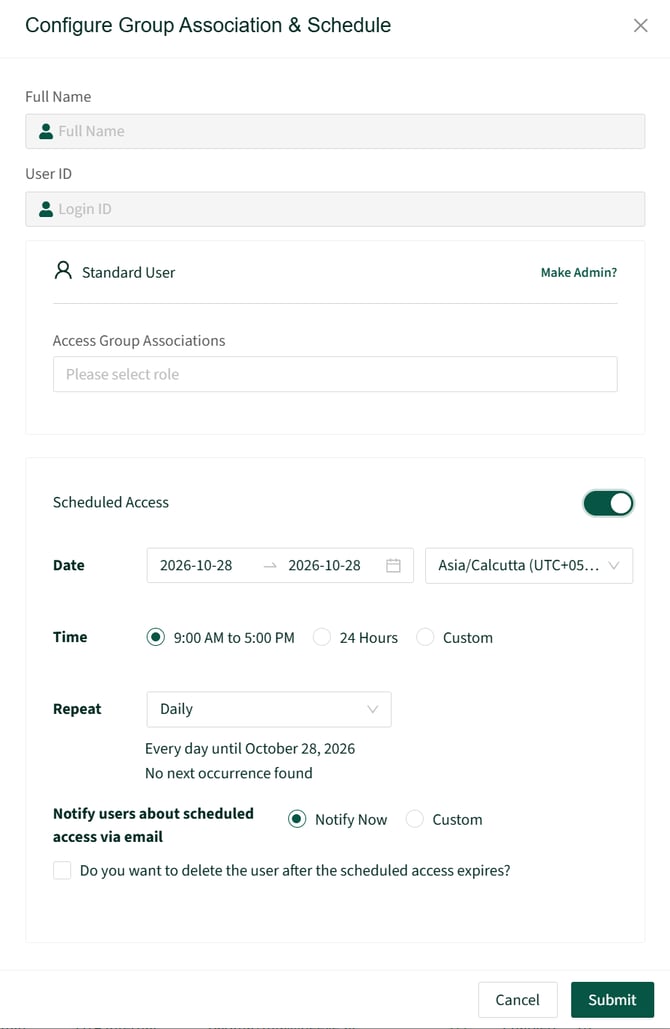
Step 1.5: Configure Group Associations & Access Schedule
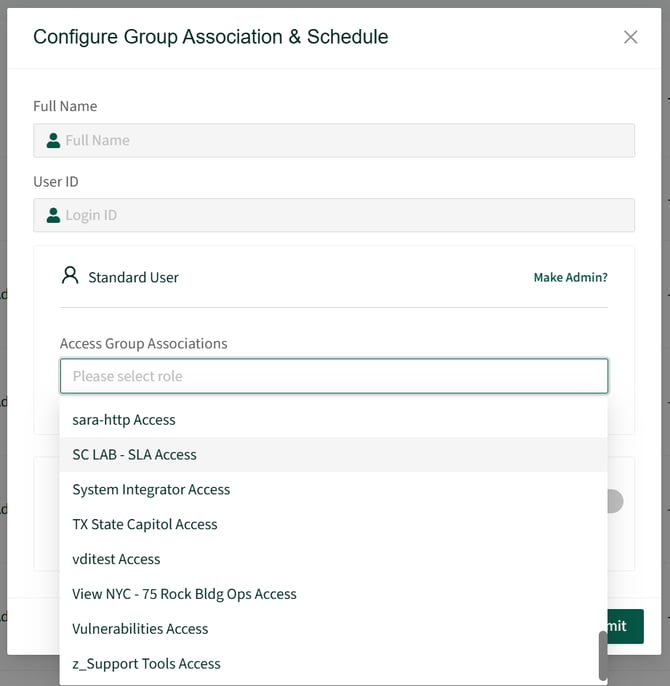
When configuring an access user or standard user in the Configure Group Association & Schedule model:
- Role Status: Confirm user profile type (displays as Standard User; click Make Admin? if privilege escalation is required).
- Access Group Associations: Click the dropdown menu and select the required access group roles applicable to the user (e.g., sara-http Access, System Integrator Access, Vulnerabilities Access).
- Scheduled Access Toggle: Enable the Scheduled Access toggle switch to enforce time-based access parameters.
- Date & Timezone Selection: Set the effective Date range and select the appropriate Timezone (e.g., Asia/Calcutta UTC+05:30).
- Time Window: Choose the daily operational access window:
- 9:00 AM to 5:00 PM (Standard business hours)
- 24 Hours (Unrestricted daily access)
- Custom (User-defined custom hours)
- Recurrence / Repeat Schedule: Select the repeat interval (e.g., Daily) and review the occurrence summary.
- Email Notification: Choose notification preferences under Notify users about scheduled access via email:
- Notify Now (Sends immediate email notification to user upon submission)
- Custom (Schedules email notification at a specified time)
- Account Lifecycle Expiry (Optional): Check the box Do you want to delete the user after the scheduled access expires? if temporary provisioned access requires automatic account cleanup upon expiration.
Step 1.6: Final Submission & Verification
- Re-verify all selected group roles, scheduled access windows, and notification options.
- Click Submit at the bottom right corner of the window to save the access configuration and complete user onboarding.
2. Bulk User Onboarding Procedure:
Step 2.1: Enable Bulk Configuration & Download Template
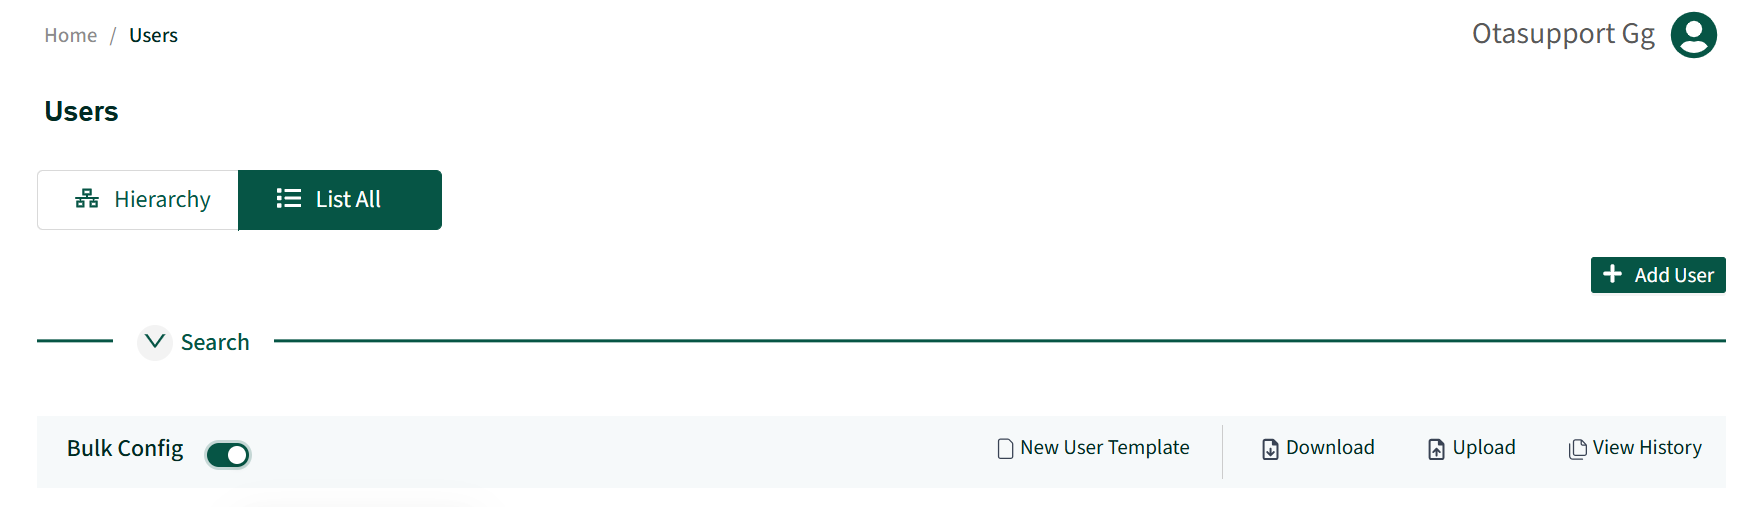
- Navigate to the Users management page.
- Toggle the Bulk Config switch to the ON position.
- Click New User Template (or Download) to download the standardized CSV/Excel user creation template.
Step 2.2: Prepare & Upload Bulk User File
- Populate the downloaded template with user data ensuring correct formatting for First Name, Last Name, Email Address, Phone, and Auth Domain.
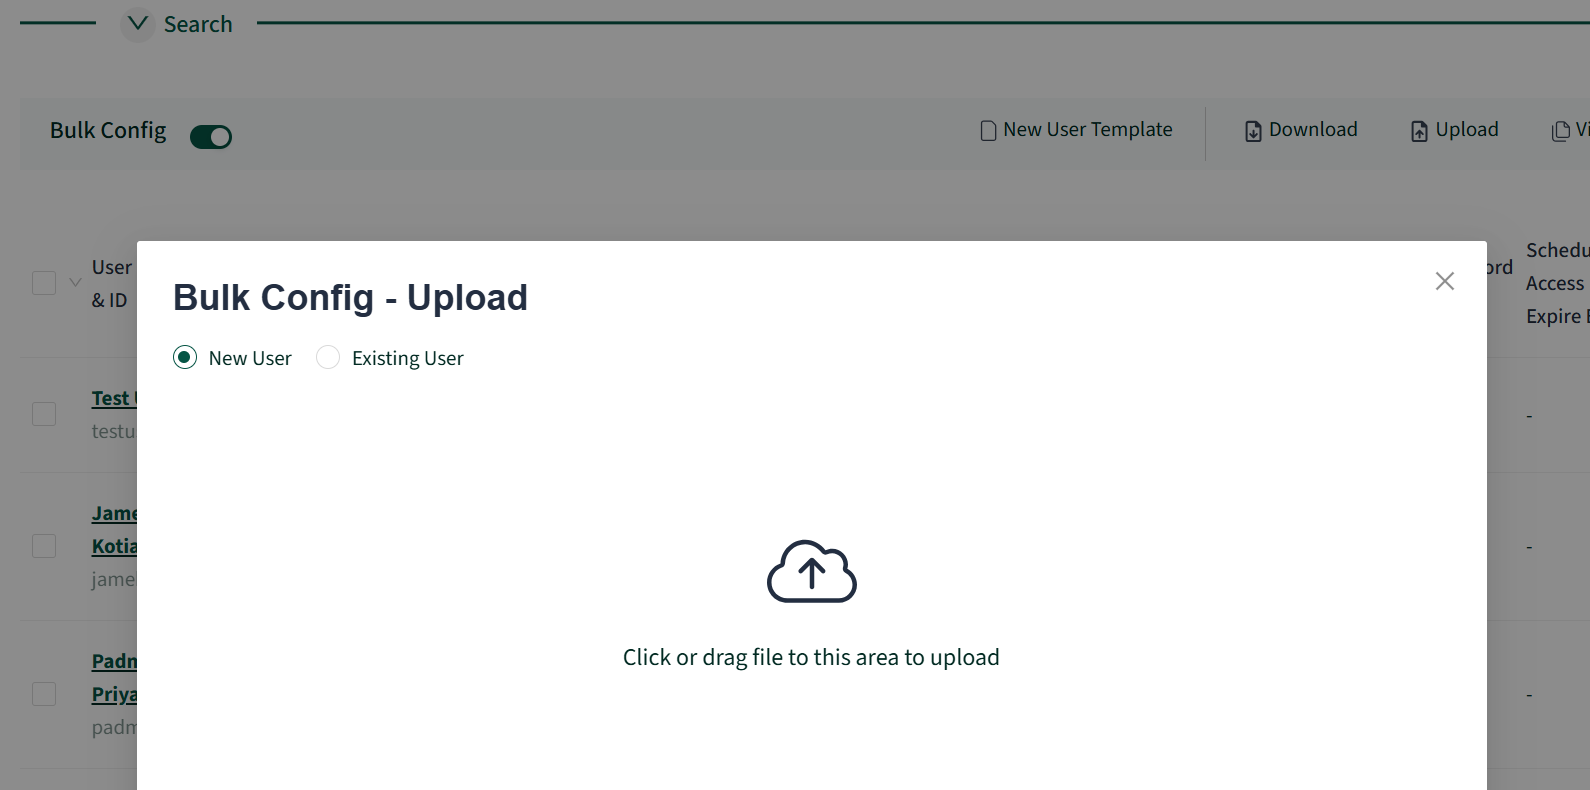
- Click the Upload button on the toolbar to open the Bulk Config - Upload modal window.
- Select the New User radio button (or Existing User for updating existing records).
- Drag and drop the prepared file into the upload zone or click to select the file from your local storage.
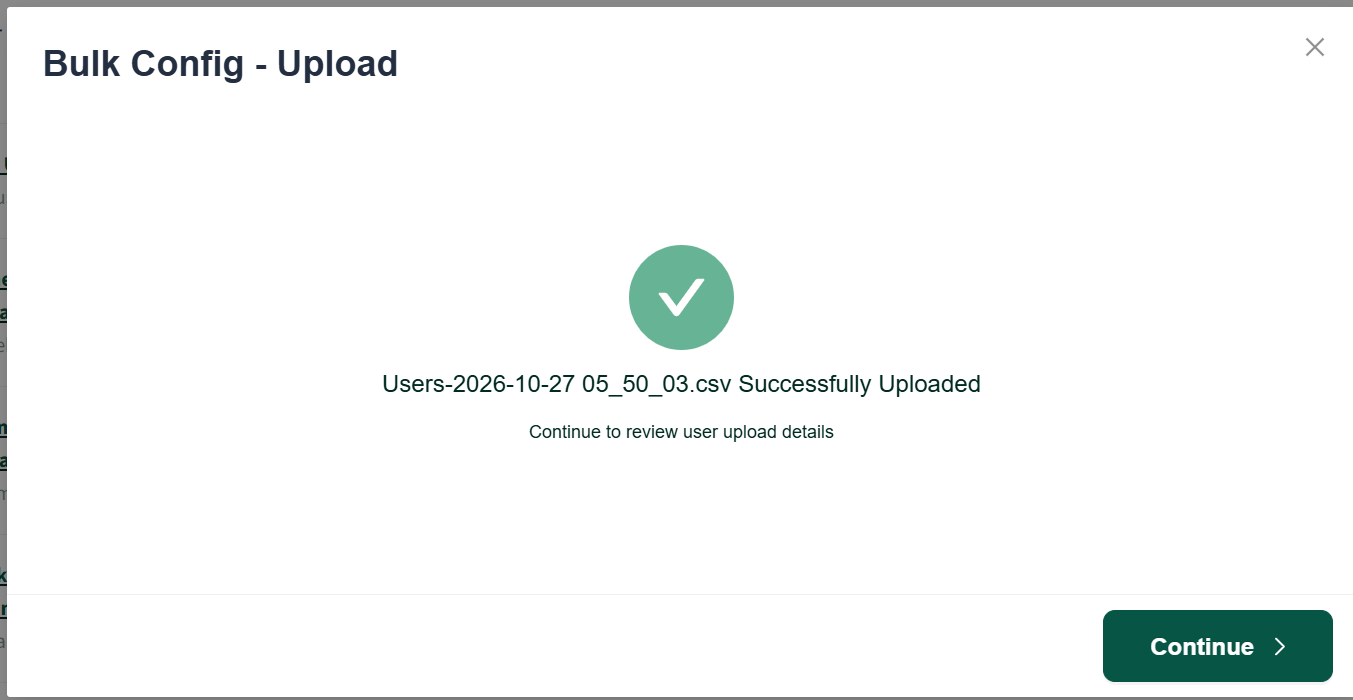
Step 2.3: Review Bulk User Details
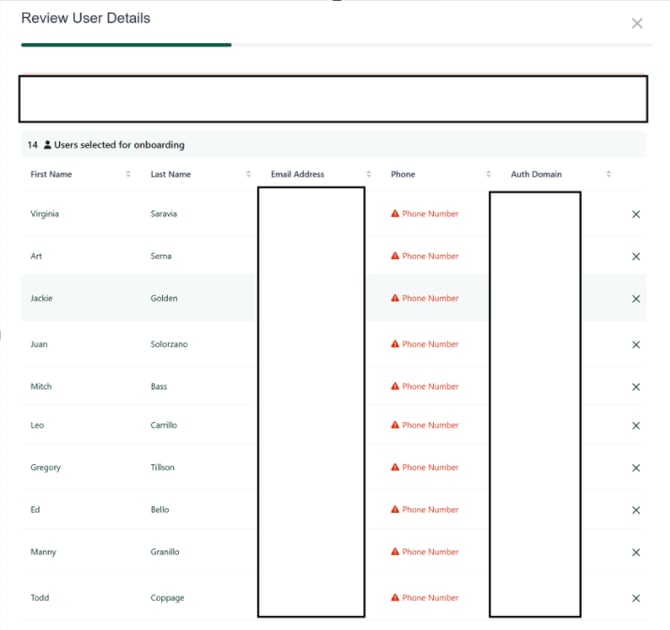
- The Review User Details window will open, displaying the count of users selected for onboarding (e.g., 14 Users selected for onboarding).
- Review the batch list table (First Name, Last Name, Email Address, Phone, Auth Domain).
- Resolve any missing field warnings (e.g., red Phone Number missing warnings) or remove individual entries by clicking the X button next to the row.
- Proceed to role configuration once all entries are validated.
Step 2.4: Configure Bulk User Role Assignments
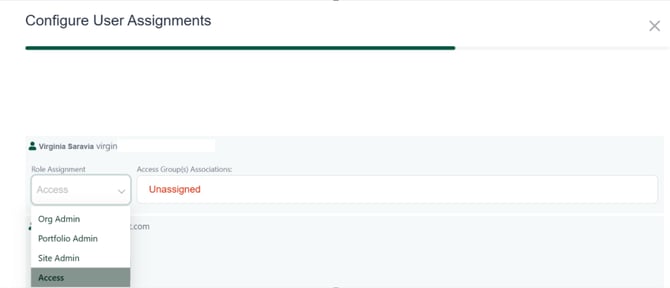
- In the Configure User Assignments screen, review each onboarded user profile.
- Click the Role Assignment dropdown menu for each user and assign the designated system role:
- Org Admin: Organization-level administration rights.
- Portfolio Admin: Administration rights over specific asset portfolios.
- Site Admin: Site-specific administrative capabilities.
- Access: Standard operational access user.
- Access Group(s) Associations: Ensure that the access groups are mapped properly for each user:
- When a role like Access is selected, check the Access Group(s) Associations field.
- If the status displays red Unassigned, click into the field to select and assign the appropriate access group(s) from the dropdown options.
3. Click Continue to finalize assignments and complete the bulk onboarding process.
Step 2.5: Verify Confirmation Summary & Complete Process
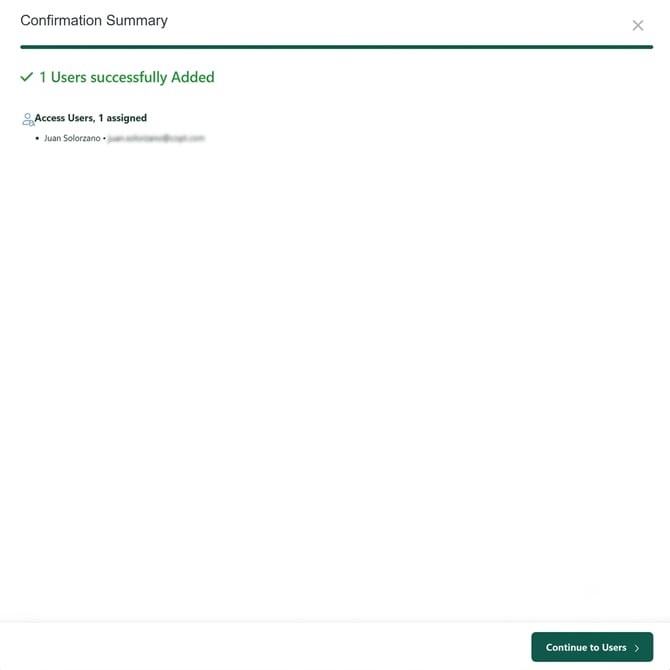
- Upon submitting, the Confirmation Summary screen will automatically display.
- Verify the total count of successfully provisioned accounts (e.g., ✔ 1 Users successfully Added or total count assigned).
- Review the breakdown list of assigned users grouped by access type (e.g., Access Users, 1 assigned showing full name and email address).
- Click the green Continue to Users button at the bottom right corner to return to the primary user directory list.
Audit & Operations Note: Users cannot be successfully saved with an Unassigned access group status when an Access role is selected. Always double-check the Confirmation Summary to ensure all accounts match expected assignments. Use the View History button on the Bulk Config toolbar to inspect past bulk upload logs and audit trails.