![Neeve-Logo-Lockup-SM_rectangle_reverse .png]](https://support.neeve.ai/hs-fs/hubfs/Neeve-Logo-Lockup-SM_rectangle_reverse%20.png?height=40&name=Neeve-Logo-Lockup-SM_rectangle_reverse%20.png)
1. Overview and Prerequisites
Before proceeding with device onboarding, ensure the following prerequisites are met:
- Administrative privileges (Org Admin or Device Manager role) in the Remote Access Portal.
- Target site name and IP network assignment for the physical/virtual endpoint.
- Target service protocol specifications (e.g., HTTP, HTTPS, SSH, RDP, port numbers).
- Designated user access group name (e.g., Site FM team, Org Admin) to grant permission.
2. Step-by-Step Procedure
Phase 1: Navigate to Device Management
- Log in to the Remote Access Portal (<Orgname>.remoteaccess.neeve.ai) using your organization credentials.
- From the main left-hand navigation menu, click on the Device Icon to open the Device Endpoints dashboard.
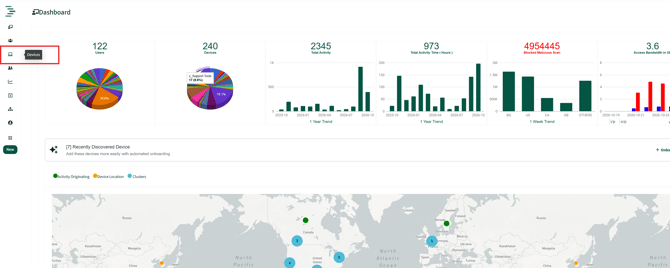
Phase 2: Add New Device
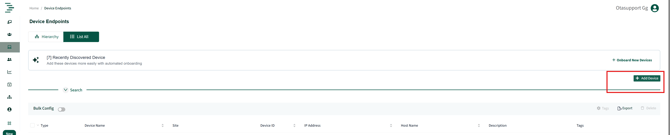
- On the top-right of the Device Endpoints page, click the Add Device button.
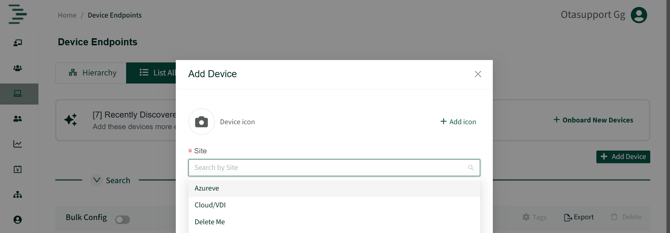
- Click on the Site dropdown list and select the target site or cloud vdi.
- Complete the required device parameters in the Add Device modal:
- Device Name*, IP Address*, Host Name*, Description*, Tags*
- Address Information of the Device(Optional)
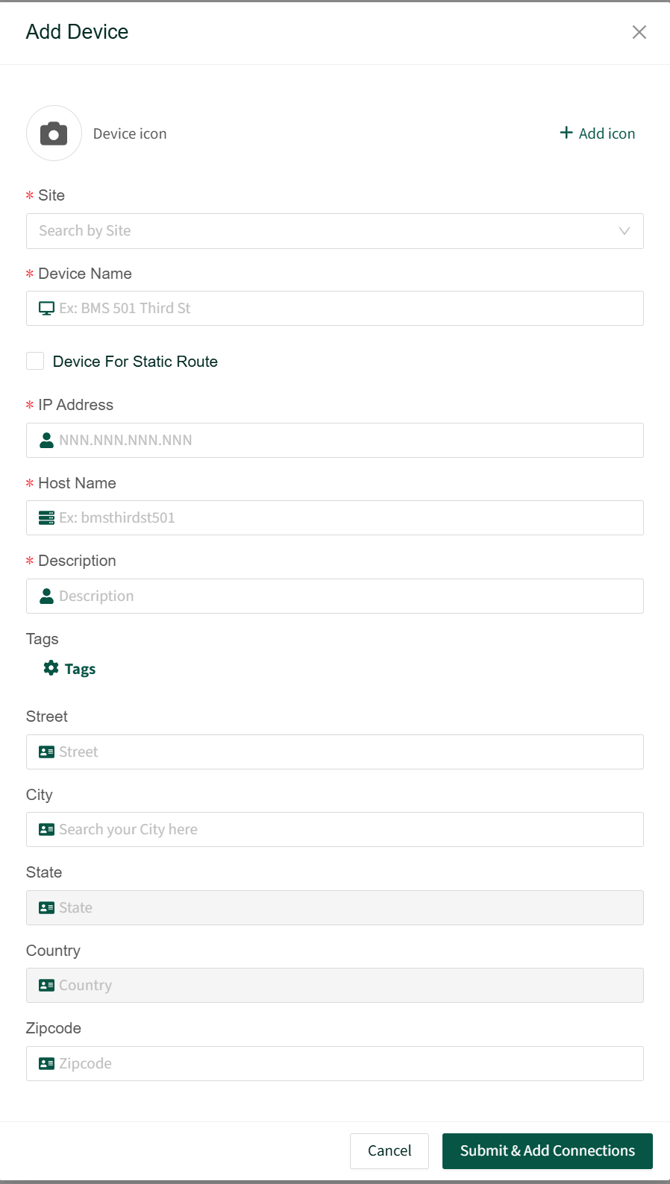
- After completion of the device information click on Submit & Add Connections.
Phase 3: Configure and Associate Connection Service
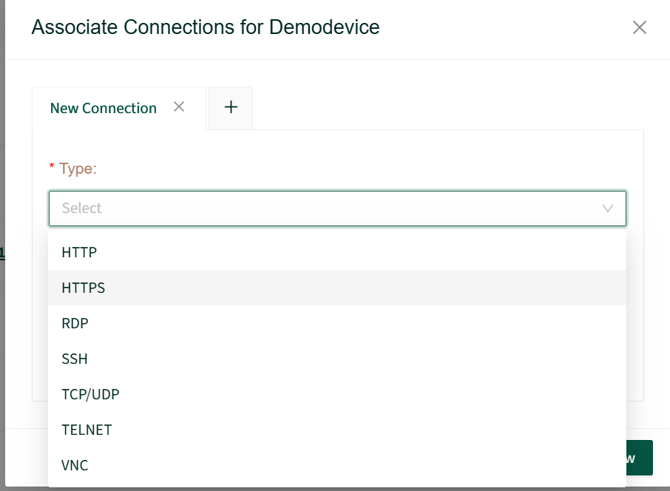
- In the Associate Connection form, click on the Type dropdown list.
- Select the connection protocol matching the endpoint service:
- HTTPS / HTTP: Web user interfaces, BMS portals, controller dashboards.
- SSH: Secure shell terminal access for Linux/Unix hosts or network switches.
- RDP: Windows remote desktop administration.
- Custom TCP/UDP: Specialized field bus or automation protocols.
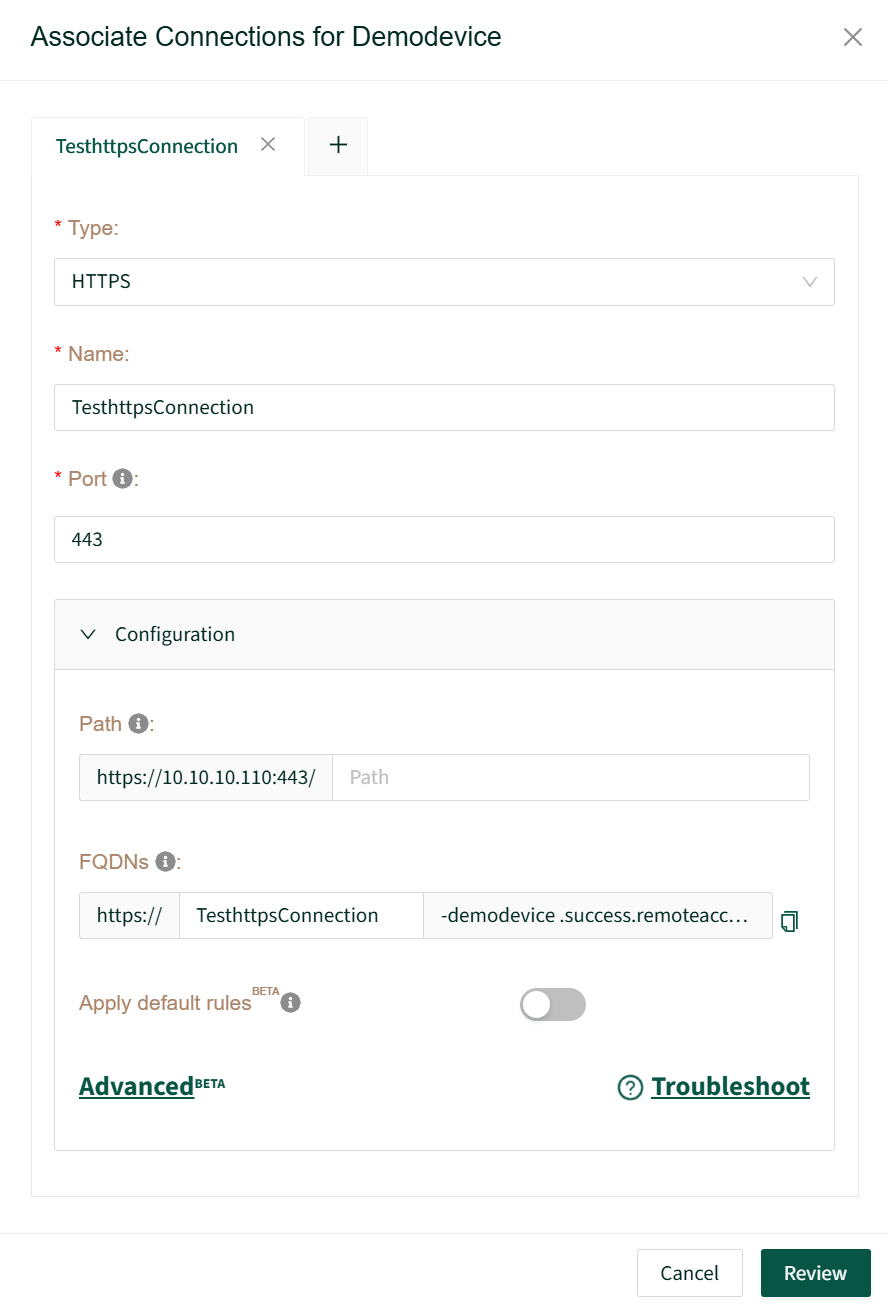
- Fill in the service details:
- Connection Name: Enter a friendly display name (e.g., BMS Webpage).
- Port: Specify the listening destination port (e.g., 443 for HTTPS, 80 for HTTP, 22 for SSH).
- URL Path / Routing (if applicable): Base path or specific reverse-proxy URL paths.
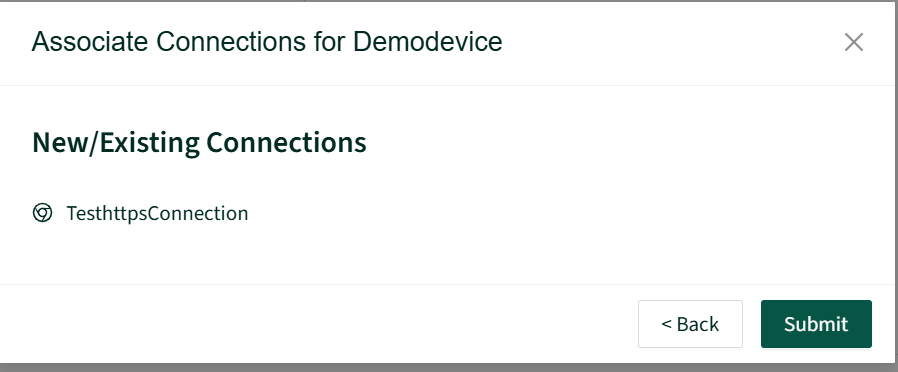
- Click the Review button to double-check the connection parameters.
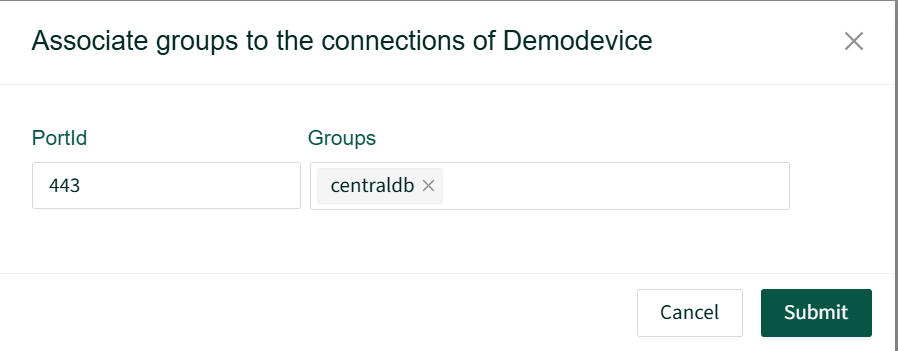
- Click Submit & Add to Group.
Phase 4: Assign to User Access Group
- In the Add to Group dialog, locate the Group selection dropdown or checklist.
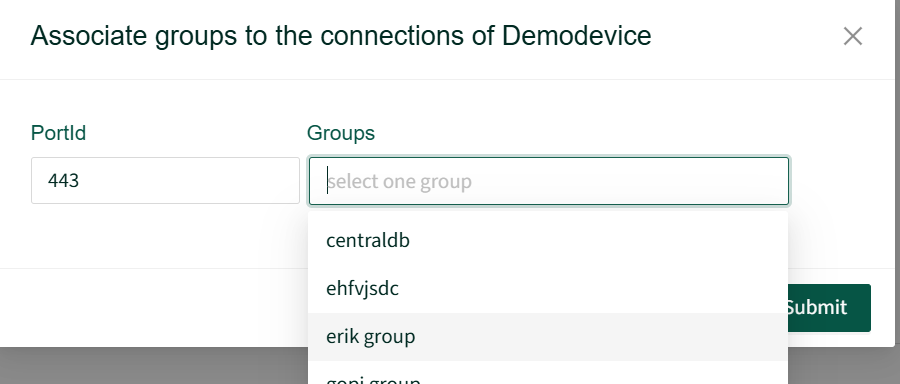
- Select the appropriate user group requiring access to this connection (e.g., 52 BMS or engineering group).
- Click the Submit button to finalize the assignment.
|
Stage |
Field Name |
Field Description |
Example Value
|
|---|---|---|---|
|
Device Setup |
Site |
Physical building or deployment facility |
52 mark Place |
|
Device Setup |
Device Name |
Unique hostname for endpoint identification |
BMS-Controller |
|
Device Setup |
IP Address |
Local intranet IPv4 address of endpoint |
192.168.10.50 |
|
Connection Setup |
Connection Type |
Application communication protocol |
HTTPS |
|
Connection Setup |
Connection Name |
Display label shown to end-users in portal |
BMS Webpage |
|
Connection Setup |
Target Port |
Listening network port on endpoint |
443 |
|
Group Assignment |
Access Group |
Role-based access group authorized to connect |
52 BMS Operations |
Visibility Test: Have an assigned user in the target group log in (preferably using an Incognito/Private window or Microsoft Edge) and verify that the new connection shows up on their dashboard.- Port Connectivity: If the connection shows healthy in the portal but fails to load for the client, verify that the local device has the destination port listening and that local firewalls are not dropping ingress traffic.
- Group Mapping: If users cannot see the connection, confirm the user accounts are members of that group.
Note: Always verify that HTTPS certificates or custom SSL configurations on the device match the connection type chosen to prevent browser handshake failures.